Sunday, July 14, 2013

Only One Section Left to Complete

July 8, 2013

Section VII - Lace

There are so many hundreds of beautiful lace patterns in knitting. Knitted lace is prettiest when worked with fine yarn on small needles.  It also gives very nice effect with worsted-weight yarn on medium-sized needles. Almost any lace pattern may be used to make lovely scarves, shawls, overskirts, stoles, summer sweaters and baby things.

When working with lace, remember to cast on and bind off loosely, and stretch each lace pattern when blocking or pressing, to open up the holes.

All lace patterns are actually increase-and-decrease patterns, of a special ind. Every yarn-over is an increase. It makes a hole; and it also places a new stitch on the needle. Therefore in every lace pattern there are  decreases to compensate for the increases created by the yarn-overs, and to maintain the same number of stitches. One single decrease compensates for a single yarn-over, or one double yarn-over is compensated for by two single decreases or one double decrease.

July 9, 2013

Square 49
Tilted Trellis
The Trellis formation - a yarn-over and single decrease - made every right-side row - is the basic constituent of most lace patterns. There are two general types of Trellis, one in which the decrease comes before the yarn-over, and the other in which it comes after. The first half of this pattern shows the former, the second half the latter.

This square demonstrates the fact that when the same kind of Trellis is worked in the same spot for several consecutive rows, it draws the fabric into a bias slant. Notice the blocks of plain Stockinette Stitch here, in which the stitches lie at two different angles instead of running straight up. This tilted effect is created by alternating the two different types of bias Trellis.

When the Trellis is moved one stitch over to the right or left every other pattern row, the bias is eliminated.

July 10, 2013

Square 50
Arrowhead Mesh
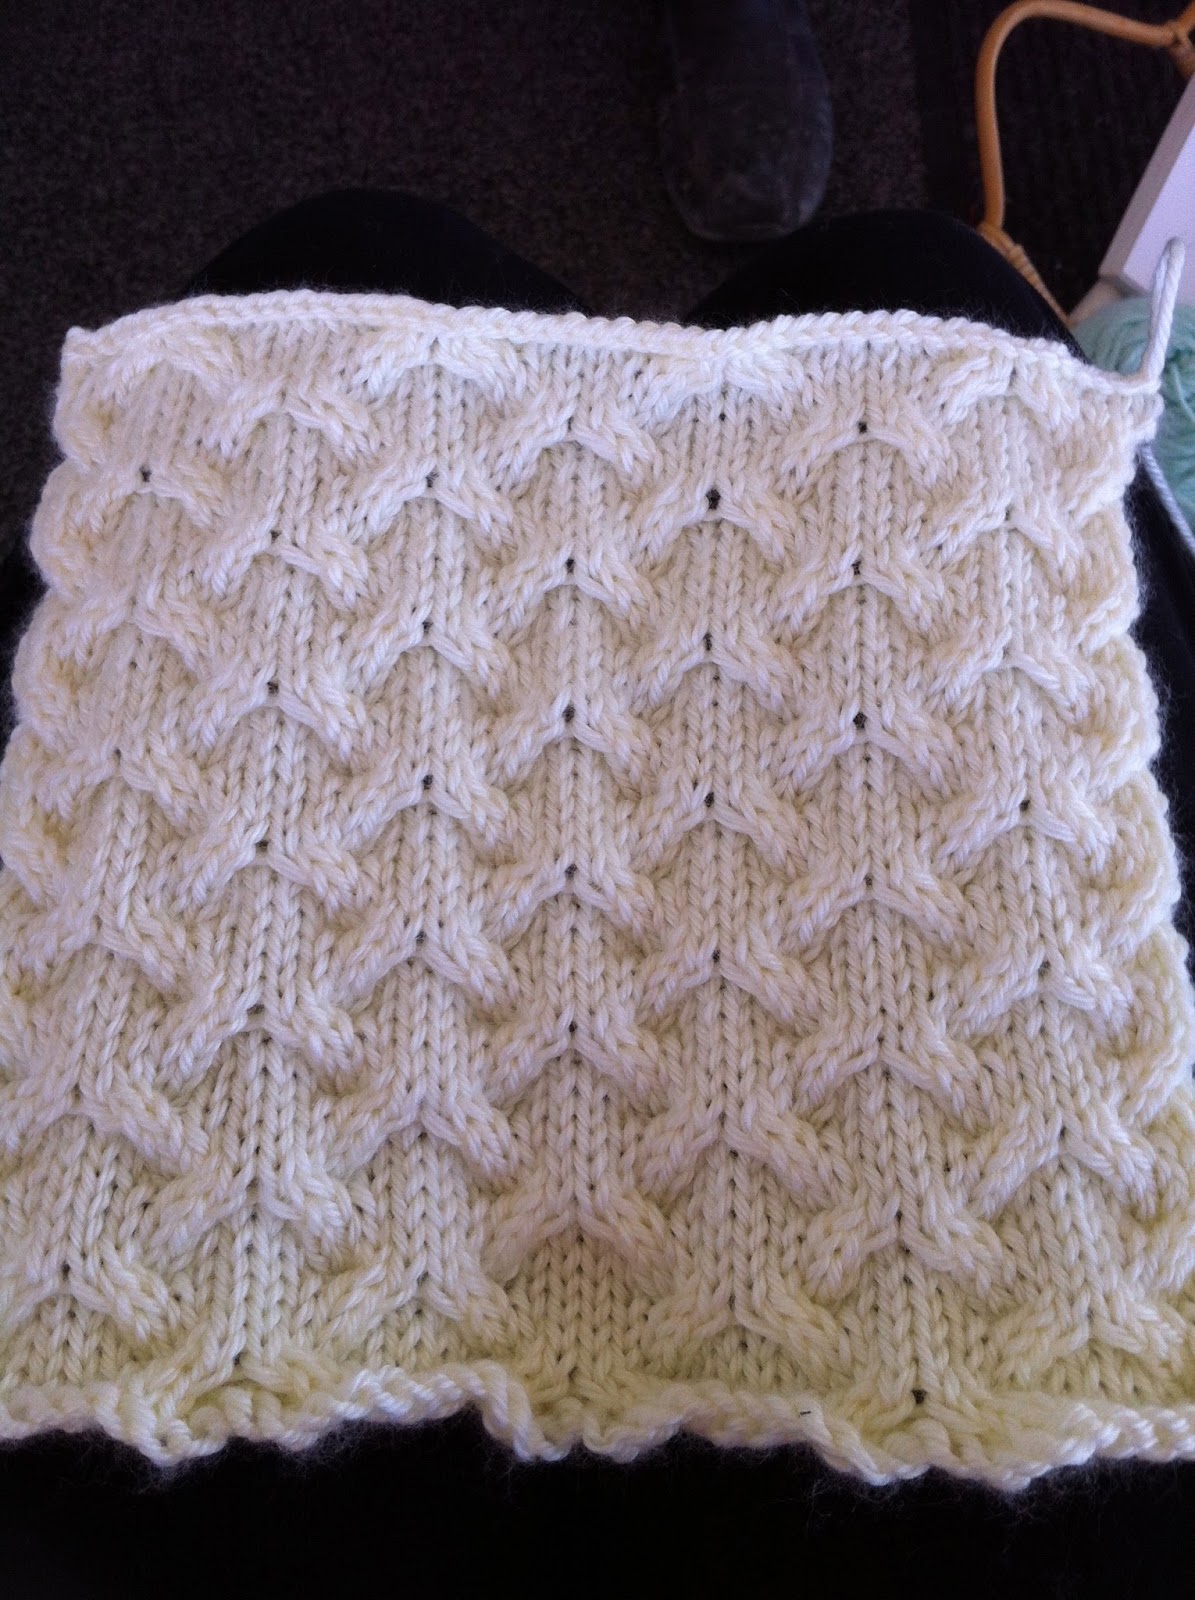
In this pattern the two types of Trellis are shown alternating in panels without bias, because the yarn-over-and-decrease units are moved one stitch over, every other pattern row. The left-slanting and right-slanting decreases are placed in opposition to each other, which gives a herringbone effect. Many other lace patterns make use of the same principles.

July 11, 2013

Square 51
Faggoting and Fancy Rib
Faggoting is a basic lace stitch, typically exhibiting panels of zigzag openwork. It is nearly always constructed of yarn-overs and decreases worked on both right-side and wrong-side rows. It is used in borders, decorative insertions and lacy articles such as scarves.

July 12, 2013

Square 52
Lace Diamonds
 Innumerable variations on the Lace Diamonds pattern exist; some have diamonds of different sizes, some have decreases centered instead of placed at the sides of the diamonds, some have more or less openwork placed between diamonds, some have certain pattern rows repeated several times together. This version is one of the simplest and most basic of all, showing the diagonal lines of yarn-overs and paired decreases without embellishments.

Square 53
Bumblebee Pattern
This pattern is a cute one and was simple to knit. As you can see, I finished two today. This square completes all but 10 of the squares required to complete the afghan.

July 13, 2013

Square 54
Seafoam Pattern
Believe it or not, this lacy pattern is really nothing but Striped Garter Stitch - with multiple yarn-overs added to elongate some of the stitches and make the stripes wave up and down. This makes a light, fluffy fabric that is ideal for shawls, baby blankets, scarves and stoles.

July 14, 2013

Square 55
Single-Strand Lace
Compare this pattern with Lace Diamonds. Notice that the yarn-over holes here are divided form one another by a single strand of yarn, while in Lace Diamonds, and many other lace patterns, they are divided by two twisted strands. Single-Strand Lace like this is worked by making yarn-overs and decreases on both right-side and wrong-side rows, instead of on right-side rows only.

Square 56
Elkhorn and Fleurette Panels
Lace patterns can be used in panel combinations just like cables. Here is a panel of Elkhorn lace, flanked by two panels of Fleurette. A panel of lace can be inserted in any plain Stockinette fabric, simply by placing 2 markers on the needle and working the lace pattern between them.

This completes Section VII and only leave one more section to complete - Section VIII - Special Techniques.

Tuesday, July 9, 2013

Section VI finished. Only two sections left to complete.

June 28, 2013

Square 41
Bias Stripes
Backside

Square 41
Bias Stripes
Frontside
Bias knitting may be used with any sort of pattern. Bias squares worked in mosaic patterns, for example, make interesting pillows and bags; bias stripes make attractive neckties, scarves and stoles. Whole garments can be shaped with bias knitting. The principle is always the same: beginning at one corner, single increases are made every other row on both sides until one edge is the desired width; then, to maintain the bias, one side is decreased, the other continues to increase, to the desired length; then both sides are decreased for a straight edge at the top. Any kind of single increases or single decreases may be used.

June 30, 2013

Today is Sunday and the last day of the month. I finished another square just before bedtime. I didn't knit yesterday at all because Steve and I spent the whole day together working on building the deck. So I actually knitted the square over a two day period.

Square 42
Ripple

Ripple knitting is almost a separate technique in itself. The basic increase-and-decrease pattern can be varied with any sort of color combination and with wrong-side rows either knitted or purled, or some of each; and the number of stitches to a repeat may be different. There could be, for instance, 4 stitches between the double increases and the double decreases (a multiple of 12), or 5 stitches (a multiple of 14), or 6 stitches (a multiple of 16), etc.; there could be some repeats wider than other in the same piece.

Patterns of this type cause the cast-on and bound-off edges to form scallops. This might create a bit of a problem in joining this square into the afghan, but it can be flattened out well enough.

July 1, 2013

Square 43
Trinity Stitch
 Trinity Stitch, also known as Cluster Stitch, Bramble Stitch, Blackberry Stitch and several other names, is a classic Aran texture pattern often used along with cables in fisherman sweaters. It makes interesting panels in otherwise plain garments, and has become one of the most popular of the "nubby" increase-and-decrease patterns.

July 2, 2013

Square 44
Cocoon Stitch
 Although the knit ribs in this handsome texture pattern are worked straight up, notice how the 5-stitch increases and decreases draw them into graceful curves framing the purled "cocoons".

July 3, 2013


Square 45
Bobble and Leaf
 This square demonstrates two popular increase-and-decrease formations: the bobble, which is worked by increasing in one stitch and making several short rows over the increased stitches before decreasing; and the embossed leaf, which is worked by increasing at one spot throughout several rows, then decreasing throughout several more. Both formations have many variations. A bobble, requiring only one stitch and one row for its completion, can be placed anywhere. It is often used as a decoration for cable patterns. The embossed leaf can be used in panels or in border bands, as well as all over the fabric.

Not all the rows in this pattern maintain the same number of stitches You'll find that Rows 5 through 9 and 15 through 19 have 2 stitches less per repeat, reducing the multiple to 12. This is not at all uncommon in increase-and-decrease patterns; in fact, it is more usual than not. If starting or stopping such a pattern on one of its off-count rows, it must take into consideration this kind of a change in multiple.

July 5, 2013

Square 46
Reverse Fern Stitch
 Double increases arranged in a continuous vertical line, as shown in the lower half of each diamond-shaped motif in this pattern, make the best kind of shaping for the raglan "seams" of a seamless sweater yoke worked form the neck down. There are at least a dozen different methods for shaping such a raglan yoke with different kinds of increases but this pattern, showing stitches fanning out from the increase lines, gives you the basic idea.

July 6, 2013
Square 47
Inchworm
 This a good example of the type of pattern that increases a lot of stitches al at once, then gradually decreases them away on subsequent rows. This is what causes the bunching - thus the "inchworms".

July 7, 2013

Square 48
Vine Leaf Panel
This beautiful increase-and-decrease panel makes a striking decoration for a sweater front or sleeve, and you can place it anywhere, just by setting two markers 26 stitches apart as shown in this square. Notice that the Stockinette edge stitches that adjoin the panel are knitted in back every right-side row, as directed in Row 2. This is a designer's trick to prevent these stitches from becoming too loose, as they are sometimes inclined to do when placed next to purl stitches in this way. It's worth remembering for future projects.

This completes Section VI. And now I'm ready to start Section VII - Lace, the first of the last two sections required for finishing all the squares required for the afghan.

Thursday, June 27, 2013

Because I'm a Blockhead, I'm also Square...

June 21, 2013

Square 34
Double Cables

The center panel of this square shows one version of the Chain or Medallion cable; the other two panels show the typical Double or Horseshoe cable, one opening away from its center and the other closing toward its center. Varying numbers of stitches and pattern rows make varying sizes and styles of the basic Double Cable.

June 22, 2013

Square 35
Lacing Cable

The Lacing Cable is very striking when inserted, as here, into a Stockinette Stitch fabric. Variations include: 2-stitch rib instead of 3-stitch ribs; diagonal movement on the background 1 stitch at a time instead of 2 stitches at a time; or extra cable rows to make another twist in the center.

June 23, 2013

Square 36
Arches
This square shows one example of a class of patterns in which cable crossings are embedded in a Stockinette Stitch fabric. Such patterns are usually simple to work, and give very nice texture effects.

June 24, 2013

Square 37
Wrung-Rib Pattern
 This interesting pattern demonstrates the cabling technique used to make a crossing of an odd number of stitches, when the central stitch is to be placed between the two groups on either side. The central stitch in these cables is a purl stitch, which helps to distinguish it from the knit groups that cross in front and in back of it. In other such patterns, the central stitch may be a knit stitch like all the others in the cable.

June 25, 2013

Square 38
Open Cables and Four-Rib Braid
 Two Open Cables appear in this square, one crossing to the right and the other to the left. These cables are often used on button bands, since buttonholes can be attractively placed in their open centers. The Four-Rib Braid in the middle of the square is one of dozens of different versions of a braided cable, which may have 3, 4, 5 or more ribs with varying numbers of stitches in each rib.

June 26, 2013

Square 39
Cabled Lattice
 This Cabled Lattice is one of many versions. In other versions the ribs of the lattice may be wider or narrower; they may be closer together or farther apart; the background may be worked in purl stitches, as here, or in Seed Stitch or Moss Stitch or some other fabric; it may have secondary patterns such as diamonds, ribs or bobbles.

June 27, 2013

Square 40
Variation Cable
These patterns demonstrate some unusual ways of handling the cable needle, which may come as a surprise even to knitters who have done a lot of cable work. I had never knit any cables like these before this square. The End-Over-End Cable (the ones on each side of the center cable), which looks almost - but not quite - like an ordinary Simple Cable, is especially interesting, and its cross is certainly faster to work that the usual cable cross. The cable needle holding the stitches is turned 1/2 way around clockwise for one and counterclockwise for the other allowing the backside of the stitches on the cable needle to be knit. The Ribbed Cable (the ones on each edge) changes knit stitches to purl stitches, and vice versa, on the group of stitches that passes in back of the cross. It also exemplifies the principle of the uneven cable, in which a greater number of stitches cross in front than behind. The Gordian Knot (the cable in the center) uses a multiple of changes to twist the stitches into a knot while crossing them at the same time. So unusual and so uniquely different.

I loved this square and all I learned from it. I have plans to use these techniques and designs in some future patterns I am designing.

This completes Section V - Cables.  Now I am beginning Section VI - Increase and Decrease Patterns. This is probably the most important section, for no knitter can be a good knitter without a precise understanding of increases and decreases. They are what create shaping, both in fabric patterns and in garment proportions.

Now off to another Square.....

Friday, June 21, 2013

Three down...but that's not the end...so many more to go!

June 9, 2013

I just finished Square 31 for the Learn-To-Knit Afghan. Since I finished Vickie's quilt I can now return to the afghan.

Square 31Twisted Panels
Three kinds of decorative panels are shown in this square: one a braid, one with diagonal stripes and one with V shapes like a Double Cable. Notice that the arrangement of panels is symmetrical in relation to the center, the patterns being worked in opposite ways on the left and right. Even the braids are worked in opposition, one beginning with a twist to the left, the other with a twist to the right. Remember this when you plan a garment or some other project displaying a series of panels. Symmetrical arrangement of designs on each side of a common center gives balance and unity to the finished article.

I will be meeting with the KnitWits this afternoon from 2:00 to 4:00 for a session of knitting and socializing. I will take the Petals Vest to knit and will also demo last week's Mystery Project from The Spinster. It should be a fun time for me since I sit and knit alone more often than not. It is only 12:00 now, so I will begin Square 32 - Assorted Mock Cables until it is time to leave for the session.

Time spent with the KnitWits was fun. I met a new member, Libby. She teaches music at a high school in my area. I finished knitting another petal for the Petals Vest. I then just visited because I left the other two completed petals at home, so I couldn't start another petal because the fourth one needed to be attached to the third one - the one left at home. Pat, our hostess, prepared pecan and lemon bars. They were yummy. I think I will fix something for the next gathering next month.

Petal One
Petals Vest Front

I am still knitting the last square of Section IV for the Learn-To-Knit Afghan. This square has many mock cables and uses stitching techniques for knitting in the back of the stitches in order to form the pattern on the right. Very complex. I am used to knitting the cable shifting from the front side of the work. Because the pattern is complex, you must really pay attention to each section. I find it tiring but useful for teaching, so I will persevere.

Square 32
Assorted Mock Cables

In this square, 7 decorative ribs demonstrate 5 kinds of twists, 3 worked from the right side and 2 from the wrong side, giving a good opportunity to compare them. Such decorative ribs look attractive when worked in combination with cables and other patterns.

Now I begin Section V - Cables. Cables are among the most fascinating of knitting patterns. They can be panel or all-over designs, and can produce hundreds of varying types of fabrics. The basic principles of cabling is very simple. It's just a matter of moving some stitches diagonally across other stitches. The cable needle is used to hold one group of stitches while the other group is being worked.

The stitches in front of the crossing, showing on the right side of the fabric, are cable stitches. The stitches in back of the crossing, behind and hidden by the cable stitches, are background stitches. If the background stitches are worked first, while the cable needle holds the cable stitches in front, the result is a Front Cross: the cable stitches travel to the left. If the cable stitches are worked first, while the cable needle holds the background stitches in back, the result is a Back Cross: the cable stitches travel to the right. Grasping this simple principle will help to understand the mechanism of any cable pattern.

Cable stitches are usually knitted on the right side and purled on the wrong side, because a vertical rib worked like this will stand out in relief on the surface of the fabric. Background stitches may be either knitted or purled on the right side. A plain purl background occurs frequently in cable patterns, because it tends to retreat, thus displaying the knit ribs to best advantage. Cables worked in panel arrangements have purl stitches between them, to make the knit ribs stand out.

Instructions for cable crossings almost always tell you to "hold" the cable needle with its stitches in front or in back while working the other stitches. But this doesn't mean that you literally have to hold onto it. You just let go of it and let it hang there. After all, you need both hands to work the other stitches and you can't spare any extra fingers to grip the cable needle, until you are ready to pick it up again and work the stitches from it. There's no need to be afraid that the cable needle will slide out of the stitches in the meantime. To make it do this, you'd have to really try.

Remember also that when the stitches are slipped to the cable needle, they are always slipped purl-wise, as when slipping stitches in any other pattern, so the right-hand sides of the loops will be forward. When working the stitches on the cable needle, hold it and use it as if it were an extra left-hand needle.

Square 33
Simple Cables with Moss Stitch
Notice that the cable made with back crosses twists to the right, while the cable made with front crosses twists to the left. When Simple Cable panels are used in a garment on each side of a common center, they should be worked in opposition, like this, for better symmetry.

Moss stitch, which forms the side panels int his square, is another classic non-curling knit-purl fabric. Like its close relative, Seed Stitch, it is often used for borders and for filling between panels of other patterns such as cables.


My friend, Sherry, who sometimes sits with me at The Needlers sent this photo. Isn't that a neat way to keep the yarn ball from rolling all over the place. And I love the idea of keeping the yarn in place with the clip. It won't get twisted that way. Thanks to you Sherry for sharing this with me.

June 12, 2013
Today I drove to Kingman, AZ and joined the knitters at The Spinster. Today we started the 3rd Mystery Project. It was an elephant. I didn't want to make an elephant, so I decided to start the crocheted Moebius from the 2nd Mystery Project. I still have lots of single skeins of yarn in my stash. I decided to use a wool blend that is multi-colored called Berries. The pattern is called Flower Infinity Scarf by Kristen Stotlzfus. This scarf is easy to crochet. It is started around a D ring, which is later covered by a cluster of flowers.


I also continued knitting additional petals for the Petals Vest.

I have added the pink and yellow petals.

I am using the remaining cotton yarn in my stash. I have needed to re-arrange my original decisions for yarn-colors placement. As I am now knitting the petals to each other, I decided I didn't want the multi-colored yarns to be directly next to each other. I am hoping I can separate them or at least place them such that they don't create visual conflict. I finished knitting the yellow petal while at The Spinster. I have already started another petal since arriving home. It will be VERY interesting to see if this vest looks decent when I am finished knitting it. At least the experience is beneficial and I do like the petal design.

June 13, 2013
Today is Vickie's 21st Wedding Anniversary with her husband Jim.

I have added the red-multi petal.

I have added the orange petal.

I have added the red petal.

I think I will call this Vickie's Vest of Many Colors. :-)

June 14, 2013

I have finished the multi-blue petal on the third row.

Two rows of petals completed, the third in progress.

The second petal on the third row - the first of two solid blue petals in the back.

I like the color arrangements thus far.

The second blue petal on the third row in the back.

One petal on the third row left to knit - another blue-multi petal like the other one.

The second blue-multi petal is completed. The third row is finished. This photo shows the front view of the Petals Vest thus far.

This is the back view of the Petals Vest thus far. I like the back petals-colors best.
The third row of petals is finished. There is one more row of petals to complete. Then the bodice/back top to finish.

June 15, 2013

I am knitting the fourth row of petals today. I have started the first petal of that row. I am using the last of the red yarn for it. I think I am using this petals design to see how my quilting and knitting can be combined. I have carefully selected colors from my stash that look good next to each other. I didn't want the multi-colors to be next to each other so I placed solid-colors between them. Using only yarn from my stash has been quite a challenge. If I were to go and purchase yarn for this same project, I would chose dark-to-light combinations and probably use the same yarn for the entire row/sections. But the challenge for me with using stash yarn has been to see what I could create with what I already had on hand. I think, with that limitation, I have done a good job of color combinations.


The four rows of petals are complete.
June 16, 2013

Steve informed me that he was coming home tomorrow. So I kicked into high gear determined to finish the vest before he arrived. I didn't want it "hanging over my head". In other words, "I didn't want my attention to be divided between him and the vest!" So I added the connecting lace band and knitted the bodice.


June 20, 2013

Steve has been home for several days now and it sure is nice having him here. He is so busy with projects around the house, that I have been free to work beside him knitting the Petals Vest and finishing the crocheted Flowers Infinity Scarf. They are both now completed except for the hand-sewing - buttons, flowers attachment, loose ends.

Front and Neck edges are finished.
Front View

Back View

The Armholes are now edge finished. Only buttons left to attach.

Back View

Front View
I don't really like this vest now that it is done. Limiting myself to using only the cotton yarns in my stash has created a vest that doesn't appeal to me at all. But I am pleased with the challenge and lessons learned for color placement within the pattern design. If I were to knit this pattern again, I would select a lighter weight yarn. I would choose colors that flowed in value from dark to light or the opposite probably using only one color per row, rather than the random colors I used above. But I did want to use my stash yarns and this pattern helped me do it. It also became a palette of colors for me to experiment with. I am going to send this to Vickie, since I made it in her size. She may not like it either. In that case, it can become a nice gift to someone else that she knows. Or maybe it will go to a thrift store and someone who is more eclectic than me will "snatch it up". <grin>

The vest still needs buttons and I will sew them on tomorrow.

Steve and I needed to go to the laundry mat so I took the Flowers Infinity Scarf with me to crochet while I waited. I find that crochet is a quick craft and was able to almost complete the scarf before returning home after the blankets were finished cleaning and drying. Steve had a pending project that required him to be gone, so I finished the scarf while I waited for his return.

 The flowers are just lying atop the scarf at the moment. I will attach them tomorrow and weave in the loose yarn ends. This scarf is very easy and quick. I used all the yarn for the scarf and didn't have enough on that skein to finish the ruffle and edging. So I used another stash skein that just happened to match the shade in the original yarn and completed the ruffle and top edging with that. I did make the first flower with another yarn that was white, but it was too stark. I didn't like the contrast. So I made the flowers with the edging yarn. They will be attached to the ring.

First flower crocheted from a lacy yarn.
The four flowers crocheted with the edging yarn.
I like the wine flowers best.
Flowers Infinity Scarf
June 21, 2013

Ta-daaah!!!!! The finished scarf.


Ta-daaah!!!! The finished Petals Vest.


Ta-daaah!!! Vickie's Quilt on her bed.


Now that all these projects are completed...on to finishing the squares for the Learn-To-Knit Afghan.  Square 34 and counting....