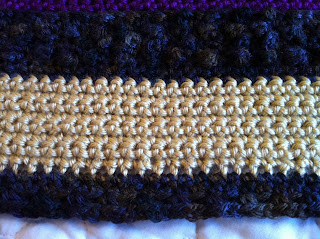
This afghan only requires 20 blocks instead of the 63 squares the other afghan needed. Each of these crocheted blocks measures 13" X 13", so they are quite a bit larger than the previous knitted ones. I was not sure if I could complete one block daily since they are larger, but voila I can. Here is the first one. The colors are gorgeous and the patterns very nice.
 |
| Block 1 Single Crochet and Variations |
Each block edge is finished as part of completing the block. Not so with the knitted squares. I like this. Each of these crocheted blocks will teach crocheting techniques and stitches starting with the single crochet and advancing through more difficult patterns with each consecutive block.
Single crochet is the perfect beginning because it is one of the most commonly used of all crochet stitches. It can be used alone as the body of a project; as a decorative join; as a one or two-row edging; or as the base stitch for other edgings in crochet, knitting, or other types of needlework.
 |
| This section displays Single Crochet stitches. |
 |
| This section displays the Picot Single Crochet stitches. |
 |
| This section displays Front Porch Pattern stitches. |
 |
| This section displays Alternating Front and Back Porch Pattern stitches. |
When making the three stitch variations in Block 1, don't think of them as techniques to be used only with Single Crochet stitches but as variations that can be used on all crochet stitches. They are tools you will tuck away in your crochet took kit to use over and over any time you want that particular effect. Just as knowledge of many tools serves a carpenter, the more crochet tools you know how to use, the more likely you are to create a finished product that is exactly what you had in mind.
One or more rows of single crochet picots may be inserted as a decorative element with any stitch. A few rows make a great divider to separate broader bands of color or stitches. In this block, the rows of picots were separated with one row of single crochet, but any stitch maybe used. For instance, you could broaden the stitch pattern by using a row of double single or half double stitches between the single crochet picot rows. Or you could form a lacy open effect by placing tall stitches between the rows.
Picot single crochet rows make an effective design feature at a cuff, neck, or hat band, or they may form an allover pattern. The picots may be offset by placing the loops of the second row of picots between the loops of the first row as designed on this block, or they may be placed above each other to form a grid effect. They may also be positioned more closely or spaced farther apart to achieve other effects.
This same variety is true of stitches worked into the front and back. They may be offset or formed in a grid, and you may work into the back or front loops of any stitch.
Okay. That's it for today. I'm putting the hook aside and will now find something else to do to relax a little. My shoulders are complaining. Ha! Time for dinner and a movie. Maybe a loooooonnnngggg talk with my honey, who is still on the road for a few more days.
No comments:
Post a Comment