June 9, 2013
I just finished Square 31 for the Learn-To-Knit Afghan. Since I finished Vickie's quilt I can now return to the afghan.
 |
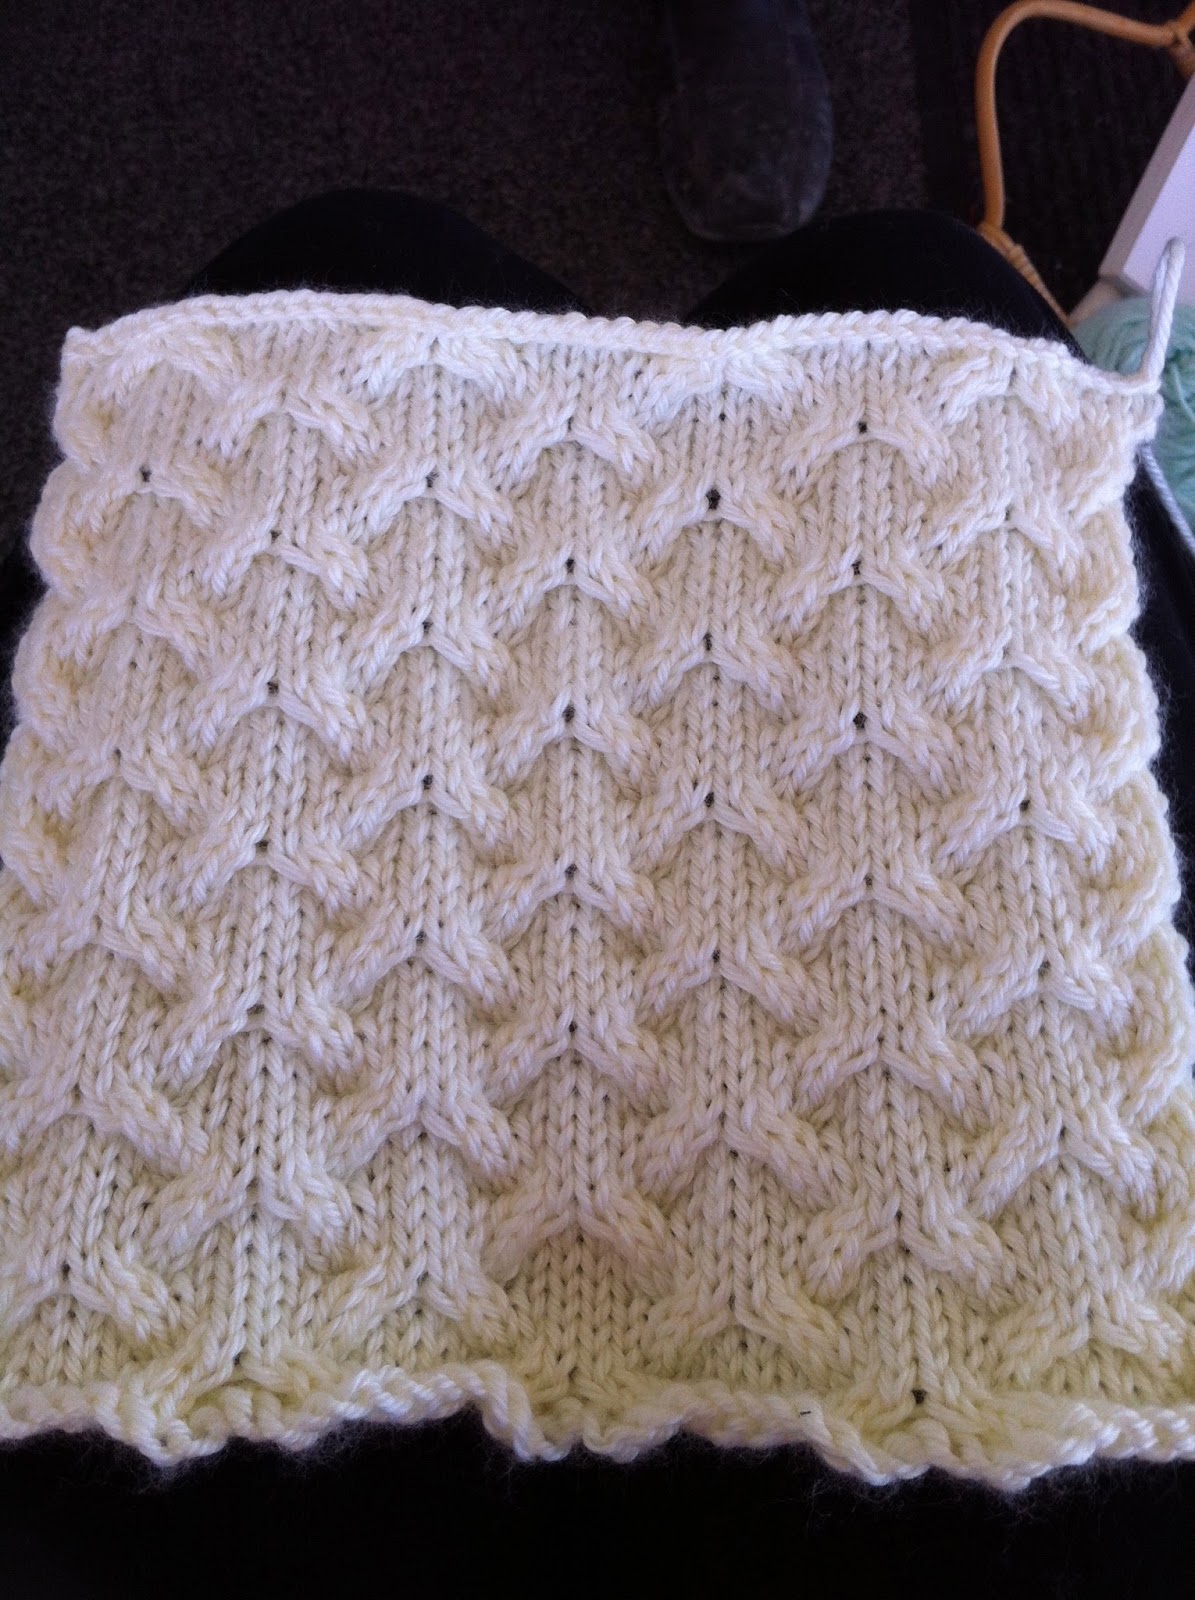
| Square 31Twisted Panels |
Three kinds of decorative panels are shown in this square: one a braid, one with diagonal stripes and one with V shapes like a Double Cable. Notice that the arrangement of panels is symmetrical in relation to the center, the patterns being worked in opposite ways on the left and right. Even the braids are worked in opposition, one beginning with a twist to the left, the other with a twist to the right. Remember this when you plan a garment or some other project displaying a series of panels. Symmetrical arrangement of designs on each side of a common center gives balance and unity to the finished article.
I will be meeting with the KnitWits this afternoon from 2:00 to 4:00 for a session of knitting and socializing. I will take the Petals Vest to knit and will also demo last week's Mystery Project from The Spinster. It should be a fun time for me since I sit and knit alone more often than not. It is only 12:00 now, so I will begin Square 32 - Assorted Mock Cables until it is time to leave for the session.
Time spent with the KnitWits was fun. I met a new member, Libby. She teaches music at a high school in my area. I finished knitting another petal for the Petals Vest. I then just visited because I left the other two completed petals at home, so I couldn't start another petal because the fourth one needed to be attached to the third one - the one left at home. Pat, our hostess, prepared pecan and lemon bars. They were yummy. I think I will fix something for the next gathering next month.
 |
Petal One
Petals Vest Front |
I am still knitting the last square of Section IV for the Learn-To-Knit Afghan. This square has many mock cables and uses stitching techniques for knitting in the back of the stitches in order to form the pattern on the right. Very complex. I am used to knitting the cable shifting from the front side of the work. Because the pattern is complex, you must really pay attention to each section. I find it tiring but useful for teaching, so I will persevere.
 |
Square 32
Assorted Mock Cables |
In this square, 7 decorative ribs demonstrate 5 kinds of twists, 3 worked from the right side and 2 from the wrong side, giving a good opportunity to compare them. Such decorative ribs look attractive when worked in combination with cables and other patterns.
Now I begin Section V - Cables. Cables are among the most fascinating of knitting patterns. They can be panel or all-over designs, and can produce hundreds of varying types of fabrics. The basic principles of cabling is very simple. It's just a matter of moving some stitches diagonally across other stitches. The cable needle is used to hold one group of stitches while the other group is being worked.
The stitches in front of the crossing, showing on the right side of the fabric, are cable stitches. The stitches in back of the crossing, behind and hidden by the cable stitches, are background stitches. If the background stitches are worked first, while the cable needle holds the cable stitches in front, the result is a Front Cross: the cable stitches travel to the left. If the cable stitches are worked first, while the cable needle holds the background stitches in back, the result is a Back Cross: the cable stitches travel to the right. Grasping this simple principle will help to understand the mechanism of any cable pattern.
Cable stitches are usually knitted on the right side and purled on the wrong side, because a vertical rib worked like this will stand out in relief on the surface of the fabric. Background stitches may be either knitted or purled on the right side. A plain purl background occurs frequently in cable patterns, because it tends to retreat, thus displaying the knit ribs to best advantage. Cables worked in panel arrangements have purl stitches between them, to make the knit ribs stand out.
Instructions for cable crossings almost always tell you to "hold" the cable needle with its stitches in front or in back while working the other stitches. But this doesn't mean that you literally have to hold onto it. You just let go of it and let it hang there. After all, you need both hands to work the other stitches and you can't spare any extra fingers to grip the cable needle, until you are ready to pick it up again and work the stitches from it. There's no need to be afraid that the cable needle will slide out of the stitches in the meantime. To make it do this, you'd have to really try.
Remember also that when the stitches are slipped to the cable needle, they are always slipped purl-wise, as when slipping stitches in any other pattern, so the right-hand sides of the loops will be forward. When working the stitches on the cable needle, hold it and use it as if it were an extra left-hand needle.
 |
Square 33
Simple Cables with Moss Stitch |
Notice that the cable made with back crosses twists to the right, while the cable made with front crosses twists to the left. When Simple Cable panels are used in a garment on each side of a common center, they should be worked in opposition, like this, for better symmetry.
Moss stitch, which forms the side panels int his square, is another classic non-curling knit-purl fabric. Like its close relative, Seed Stitch, it is often used for borders and for filling between panels of other patterns such as cables.
My friend, Sherry, who sometimes sits with me at The Needlers sent this photo. Isn't that a neat way to keep the yarn ball from rolling all over the place. And I love the idea of keeping the yarn in place with the clip. It won't get twisted that way. Thanks to you Sherry for sharing this with me.
June 12, 2013
Today I drove to Kingman, AZ and joined the knitters at The Spinster. Today we started the 3rd Mystery Project. It was an elephant. I didn't want to make an elephant, so I decided to start the crocheted Moebius from the 2nd Mystery Project. I still have lots of single skeins of yarn in my stash. I decided to use a wool blend that is multi-colored called Berries. The pattern is called Flower Infinity Scarf by Kristen Stotlzfus. This scarf is easy to crochet. It is started around a D ring, which is later covered by a cluster of flowers.
I also continued knitting additional petals for the Petals Vest.
 |
| I have added the pink and yellow petals. |
I am using the remaining cotton yarn in my stash. I have needed to re-arrange my original decisions for yarn-colors placement. As I am now knitting the petals to each other, I decided I didn't want the multi-colored yarns to be directly next to each other. I am hoping I can separate them or at least place them such that they don't create visual conflict. I finished knitting the yellow petal while at The Spinster. I have already started another petal since arriving home. It will be VERY interesting to see if this vest looks decent when I am finished knitting it. At least the experience is beneficial and I do like the petal design.
June 13, 2013
Today is Vickie's 21st Wedding Anniversary with her husband Jim.
 |
| I have added the red-multi petal. |
 |
| I have added the orange petal. |
 |
| I have added the red petal. |
I think I will call this Vickie's Vest of Many Colors. :-)
June 14, 2013
 |
| I have finished the multi-blue petal on the third row. |
 |
| Two rows of petals completed, the third in progress. |
 |
| The second petal on the third row - the first of two solid blue petals in the back. |
 |
| I like the color arrangements thus far. |
 |
| The second blue petal on the third row in the back. |
 |
| One petal on the third row left to knit - another blue-multi petal like the other one. |
 |
| The second blue-multi petal is completed. The third row is finished. This photo shows the front view of the Petals Vest thus far. |
 |
| This is the back view of the Petals Vest thus far. I like the back petals-colors best. |
The third row of petals is finished. There is one more row of petals to complete. Then the bodice/back top to finish.
June 15, 2013
I am knitting the fourth row of petals today. I have started the first petal of that row. I am using the last of the red yarn for it. I think I am using this petals design to see how my quilting and knitting can be combined. I have carefully selected colors from my stash that look good next to each other. I didn't want the multi-colors to be next to each other so I placed solid-colors between them. Using only yarn from my stash has been quite a challenge. If I were to go and purchase yarn for this same project, I would chose dark-to-light combinations and probably use the same yarn for the entire row/sections. But the challenge for me with using stash yarn has been to see what I could create with what I already had on hand. I think, with that limitation, I have done a good job of color combinations.
 |
| The four rows of petals are complete. |
June 16, 2013
Steve informed me that he was coming home tomorrow. So I kicked into high gear determined to finish the vest before he arrived. I didn't want it "hanging over my head". In other words, "I didn't want my attention to be divided between him and the vest!" So I added the connecting lace band and knitted the bodice.
June 20, 2013
Steve has been home for several days now and it sure is nice having him here. He is so busy with projects around the house, that I have been free to work beside him knitting the Petals Vest and finishing the crocheted Flowers Infinity Scarf. They are both now completed except for the hand-sewing - buttons, flowers attachment, loose ends.
 |
Front and Neck edges are finished.
Front View |
 |
| Back View |
 |
| The Armholes are now edge finished. Only buttons left to attach. |
 |
| Back View |
 |
| Front View |
I don't really like this vest now that it is done. Limiting myself to using only the cotton yarns in my stash has created a vest that doesn't appeal to me at all. But I am pleased with the challenge and lessons learned for color placement within the pattern design. If I were to knit this pattern again, I would select a lighter weight yarn. I would choose colors that flowed in value from dark to light or the opposite probably using only one color per row, rather than the random colors I used above. But I did want to use my stash yarns and this pattern helped me do it. It also became a palette of colors for me to experiment with. I am going to send this to Vickie, since I made it in her size. She may not like it either. In that case, it can become a nice gift to someone else that she knows. Or maybe it will go to a thrift store and someone who is more eclectic than me will "snatch it up". <grin>
The vest still needs buttons and I will sew them on tomorrow.
Steve and I needed to go to the laundry mat so I took the Flowers Infinity Scarf with me to crochet while I waited. I find that crochet is a quick craft and was able to almost complete the scarf before returning home after the blankets were finished cleaning and drying. Steve had a pending project that required him to be gone, so I finished the scarf while I waited for his return.
The flowers are just lying atop the scarf at the moment. I will attach them tomorrow and weave in the loose yarn ends. This scarf is very easy and quick. I used all the yarn for the scarf and didn't have enough on that skein to finish the ruffle and edging. So I used another stash skein that just happened to match the shade in the original yarn and completed the ruffle and top edging with that. I did make the first flower with another yarn that was white, but it was too stark. I didn't like the contrast. So I made the flowers with the edging yarn. They will be attached to the ring.
 |
| First flower crocheted from a lacy yarn. |
 |
| The four flowers crocheted with the edging yarn. |
 |
| I like the wine flowers best. |
 |
| Flowers Infinity Scarf |
June 21, 2013
Ta-daaah!!!!! The finished scarf.
Ta-daaah!!!! The finished Petals Vest.
Ta-daaah!!! Vickie's Quilt on her bed.
Now that all these projects are completed...on to finishing the squares for the Learn-To-Knit Afghan. Square 34 and counting....