Sunday, April 22, 2012
April 22, 2012
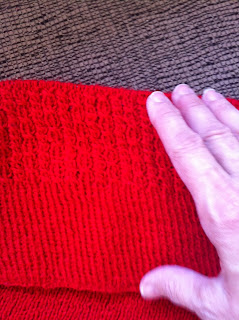
Just wanted to capture an observation. While knitting the skirt, I kept loosing track of my place. I have spent too much time tinking and decided to use the moveable markers (used in crocheting) to mark each of the three cables needing to be knit each time. Well, that worked for a while but then I still kept forgetting if I had completed three cables or not. So I colored coded the markers to help me know exactly where I was at any given time. The blue marker represented the first cable of the pattern because my firstborn is a son. The second marker is white because it is not pink, which is the last marker representing the last cable of the three because my third and last child was a daughter. Seems silly but finally it works. No matter where I stop when I put my work down, I can now easily discern right where to begin knitting again. Whew!!!
Monday, April 16, 2012
Change Again
I have stopped working for the Cafe. It became necessary due to Steve's schedule and the desire to work what is best for my marriage. End of story.
I just finished the linen sweater knitted from the top-down - Cria - Ysolda Teague's design. It finished just fine. I did fine through all the new techniques. I did not especially like the way the inset pockets were seam finished. I couldn't quite see a better way to finish the part where the two edges were sewn and the join at the corners to prevent holes. But I did what was explained and it does seem to look okay. Will see how it wears.
 I also finished the scarf - The Sling - that my knitting group decided to do as a group project.

Now I am starting to knit on my design projects again. I want to continue the skirt as planned. I knit four rows of the pattern when I discovered that my stitch count seemed to be off. So I un-knit the four rows and began again after re-configuring the pattern stitches. But then I discovered that my calculations were correct and so I un-knit the same four rows again. This time I paid special attention to the beginning of the first and third rows, which got the pattern stitch started. Voila! The pattern was correct and progress is now being made. Hooray!
 I am already planning the next project but it won't be one that I am designing. I have a shawl that I want to make with yarn already purchased. And I am still completing the poncho drape that will be knitted while I sit with my knitting group on Thursday. I will work on the new shawl while knitting with my group on Tuesday. The design projects (the top and the skirt) will be knitted the rest of the time. :-)
I just finished the linen sweater knitted from the top-down - Cria - Ysolda Teague's design. It finished just fine. I did fine through all the new techniques. I did not especially like the way the inset pockets were seam finished. I couldn't quite see a better way to finish the part where the two edges were sewn and the join at the corners to prevent holes. But I did what was explained and it does seem to look okay. Will see how it wears.


Now I am starting to knit on my design projects again. I want to continue the skirt as planned. I knit four rows of the pattern when I discovered that my stitch count seemed to be off. So I un-knit the four rows and began again after re-configuring the pattern stitches. But then I discovered that my calculations were correct and so I un-knit the same four rows again. This time I paid special attention to the beginning of the first and third rows, which got the pattern stitch started. Voila! The pattern was correct and progress is now being made. Hooray!

Friday, March 16, 2012
Another Life Change
Well, things changed rather quickly for me during this past week.
1. Steve decided that he (which means me, too) will not be going to Alaska.
2. I started working full time with Gluten Free Creations Bakery & Cafette.
3. Both my entries were not selected for the final four winners in the Juniper Moon Farms Contest.
That's okay with me in all categories. Since I am working full time now outside the home, my knitting will be taking a major backseat in my life. I still find it relaxing to knit especially after I have stood on my feet all day. I will still be designing but not quite as "full-steam" as I was previously. I am finishing The Slink (a scarf), probably tonight. I will be teaching/coaching a friend who is knitting the same project this Sunday. I will then finish the Cardigan - Cria after that. That will then leave me only my current gift project and the two design projects to continue. All in good time!!!
Friday, March 9, 2012
Interlude
I have not been busy working on my designs because I am currently taking another class with Cathrine McClure at Jessica Knits. We are making a cardigan, Ysolda Teagues' pattern Cria. The cardigan is knit from the top down and has no seams, even though the sleeves are inset and there are what appears to be side seaming. Very interesting and challenging.
.JPG) |
| This is the bodice of the cardigan knitted from the top down. The yoke is garter stitch and the body is stockinette stitch. I will add the bust darts to the front bodice once it measures 12 inches from the shoulder down the back. |
As a class we decided that we would like to add bust darts to our cardigan, but the pattern does not give implicit directions. Bust darts are formed by shaping with short rows. This means a row is knitted or purled to a certain point and then a stitch is wrapped and the work turned and knitted or purled back to another certain point. The idea is to add shorter rows in between the longer ones to add height or depth. Let me see if I can show you.
Row 1: ________________________________________________________________
Row 2: ________________________________________________________________
Row 3: ________________________________\point A __________________________
Row 4: ________________________________\
Row 5: ________________________________/
Row 6: ________________________________/point B__________________________
Row 7: ________________________________________________________________
Row 8: ________________________________________________________________
Point A and point B reconnect after the short rows and the added short rows give the extra shaping desired.
The book includes how to calculate the measurements and gives the inclusion design but for a pullover, not a cardigan. We have already taken all of the body measurements and did the calculations for our personal bust dart measurements. So today, I drew and calculated the directions for our cardigan and sent the following email to Cathrine.
Hi Cathrine,
I have figured out the directions for bust darts on our cardigan.
These directions are to be inserted on page 171 just before "Work 37 rows in patt ending with a WS row.
Bust Darts Directions:
When the cardigan measures O ______ (back shoulder to under bust) start the first row for the bust darts.
Left Dart:
Row 1 (RS): k5, sl1 pwise with yarn in front, k until _______ (stitches for each dart) front stitches remain, w+t.
Row 2: p to 6 sts from end, k6.
Row 3: k5, sl1 pwise with yarn in front, k to wrapped st, k wrap tog with st, k1, w+t.
Rep rows 2 & 3 ________ (turning points - 2) more times. Rep row 2 once again.
Next row: k5, sl1 pwise with yarn in front, *k to 1 st before marker, p1, slm, rep from * once, k to end.
Right Dart:
Row 1 (WS): k5, sl1 pwise with yarn in back, p until _______ (stitches for each dart) front stitches remain, w+t.
Row 2: k to end.
Row 3: k5, sl1 pwise with yarn in back, p to wrapped st, p wrap tog with st, p1, w+t.
Rep rows 2 & 3 _________ (turning points - 2) more time. Rep row 2 once again.
Next row: k5, sl2 pwise with yarn in back, *p to marker, slm, k1, rep from * once, p to 6 sts from end, k6.
Continue to work 37 rows in patt ending with a WS row.
I haven't worked this on my cardigan yet, but will soon. If there are any corrections, I will let you know asap. Printed copies would be nice, I think, once the directions are proven correct and complete. Just a thought.
Great working with you,
Teresa
Now it is time to knit the above directions to see if indeed they are correct. Will let you know later.
Here it is...
----------------------------------------------------------------------------------------------------------------------------------------------
I finished knitting the bodice until the length was 12 inches. I started shaping the bust dart for the left side. The instructions are "right on" until the row between the two darts and the row following the last dart. I failed to include picking up the last wrapped stitch from the final turning point. So I will re-write those instructions including the correction. Here it is...
These directions are to be inserted on page 171 just before "Work 37 rows in patt ending with a WS row.
Bust Darts Directions:
When the cardigan measures O ______ (back shoulder to under bust) start the first row for the bust darts.
Left Dart:
Row 1 (RS): k5, sl1 pwise with yarn in front, k until _______ (stitches for each dart) front stitches remain, w+t.
Row 2: p to 6 sts from end, k6.
Row 3: k5, sl1 pwise with yarn in front, k to wrapped st, k wrap tog with st, k1, w+t.
Rep rows 2 & 3 ________ (turning points - 2) more times. Rep row 2 once again.
Next row: k5, sl1 pwise with yarn in front, k to wrapped st, k wrap tog with st, *k to 1 st before marker, p1, slm, rep from * once, k to end.
Right Dart:
Row 1 (WS): k5, sl1 pwise with yarn in back, p until _______ (stitches for each dart) front stitches remain, w+t.
Row 2: k to end.
Row 3: k5, sl1 pwise with yarn in back, p to wrapped st, p wrap tog with st, p1, w+t.
Rep rows 2 & 3 _________ (turning points - 2) more time. Rep row 2 once again.
Next row: k5, sl2 pwise with yarn in back, p to wrapped st, p wrap tog with st, *p to marker, slm, k1, rep from * once, p to 6 sts from end, k6.
Continue to work 37 rows in patt ending with a WS row.
Now that I have finished the shaping, I will return to working on the Skirt. See you later.
-------------------------------------------------------------------------------------------------------------------------------------
Here is what the finished left dart looks like before I join the two rows. |
| You can see the additional rows that were knitted, wrapped and turned. The left needle is the beginning row and the right needle is the ending row. See the additional rows above the left needle? When I join the two rows the dart will be completed. |
 |
| Now you can see where the additional rows form the dart. This extra knitting shapes the breast area providing a better, more conforming fit. This also allows the rest of the cardigan to hang smoother under the breast without distortions. |
Monday, March 5, 2012
February 28, 2012
The Cowl and the Child's Hat have been mailed to Juniper Moon Farms for entry into their contest. Now we will wait and see what happens. Supposed to know the winners by the end of March.
Thursday, February 23, 2012
Starting The Third Project
I am so excited. I went to my knitting group this morning and showed my finished designs to them. Everyone was very encouraging. I realize that if I want to keep this design to use for my own patterns, then I need to design them quickly. With two patterns already posted on Ravelry, it may work against me if others start borrowing my design.
So with that in mind, I began the design for a skirt using a very fine weight yarn. Because I live in Arizona I don't want a heavy knit skirt that I can't wear. So I have chosen a 2-ply washable yarn. It is 100 % acrylic, which is not usually my favorite, but I also have plenty of the yarn that was given to me and I don't want to begin using real expensive yarn for projects that I am just using for practice. However, this yarn will still wear well if it becomes the skirt I envision.
I couldn't find any yardage printed on the pattern so I researched the brand on-line. I found the yarn with all the details and discovered that each skein has 220 yards in it. I was given 11 skeins, which means I have 2,420 yards of yarn. I decided the measurements for the skirt to be 27-inches long with a 2-inch band for folding over and encasing elastic and 18.5-inches wide, which equates to 37-inches around. There will be no hem, because the ribbing will finish the edge.
Now I needed to figure the gauge. The skein indicated that the gauge was 7 sts x 8 rows per inch. But the on-line information was different for the same yarn. It indicated that the gauge was 24 sts per 4-inches, which means 6 sts per inch. So I calculated the following:
1. I need 37 inches for the circumference of the skirt. 7 stitches per inch times 37 = 259 stitches. 6 stitches per inch times 37 = 222 stitches.
2. My pattern design requires 2 stitches for the beginning, 8 stitches for the Cable Pattern, and 6 stitches to end the round.
3. Starting with the 7-stitches-gauge first, I subtracted the 2 stitches from the beginning and the 6 stitches from the end (8 stitches) from the 259 total cast on stitches required. That gave me 31.375, which does not divide evenly by 8. So I rounded-off the total to 32. [32 X 8 = 256 + 8] = 265 stitches for this cast on.
4. Using the 6-stitches-gauge next, I subtracted the 8 stitches from the 222 total cast on stitches required. That gave me 26.75. Rounding-off that total I had 27 stitches. [27 X 8 = 216 + 8] = 224 stitches for this cast on.
5. This means I will have 33 repeating patterns for the 7-sts gauge cast on. And 28 repeating patterns for the 6-sts gauge cast on.
I have a couple ideas of how I want the design to work in this pattern. I want there to be rows with long cables running the length. I want there to be rows with two-cables for each long one in the other row. Then I might choose to have four-cables that match those two. I will try to capture the design on paper and include it later.
I will need to configure the pattern repeats to see how they fit with the calculations from #5 above. I also need to go knit a gauge so I can be absolutely sure of the stitches per inch. The yarn requirement for the needle is Size 4. So I will start there.
I finished the calculations for the design pattern on graph paper. It took a bit but I figured a 16-sts repeat that will flow nicely around the skirt, matching at the beginning of each round.
I finished the swatch and the gauge for me using a Size 4 needle is 7 sts x 8 rws per 1-inch.
Okay, that is it for tonight.
So with that in mind, I began the design for a skirt using a very fine weight yarn. Because I live in Arizona I don't want a heavy knit skirt that I can't wear. So I have chosen a 2-ply washable yarn. It is 100 % acrylic, which is not usually my favorite, but I also have plenty of the yarn that was given to me and I don't want to begin using real expensive yarn for projects that I am just using for practice. However, this yarn will still wear well if it becomes the skirt I envision.
I couldn't find any yardage printed on the pattern so I researched the brand on-line. I found the yarn with all the details and discovered that each skein has 220 yards in it. I was given 11 skeins, which means I have 2,420 yards of yarn. I decided the measurements for the skirt to be 27-inches long with a 2-inch band for folding over and encasing elastic and 18.5-inches wide, which equates to 37-inches around. There will be no hem, because the ribbing will finish the edge.
Now I needed to figure the gauge. The skein indicated that the gauge was 7 sts x 8 rows per inch. But the on-line information was different for the same yarn. It indicated that the gauge was 24 sts per 4-inches, which means 6 sts per inch. So I calculated the following:
1. I need 37 inches for the circumference of the skirt. 7 stitches per inch times 37 = 259 stitches. 6 stitches per inch times 37 = 222 stitches.
2. My pattern design requires 2 stitches for the beginning, 8 stitches for the Cable Pattern, and 6 stitches to end the round.
3. Starting with the 7-stitches-gauge first, I subtracted the 2 stitches from the beginning and the 6 stitches from the end (8 stitches) from the 259 total cast on stitches required. That gave me 31.375, which does not divide evenly by 8. So I rounded-off the total to 32. [32 X 8 = 256 + 8] = 265 stitches for this cast on.
4. Using the 6-stitches-gauge next, I subtracted the 8 stitches from the 222 total cast on stitches required. That gave me 26.75. Rounding-off that total I had 27 stitches. [27 X 8 = 216 + 8] = 224 stitches for this cast on.
5. This means I will have 33 repeating patterns for the 7-sts gauge cast on. And 28 repeating patterns for the 6-sts gauge cast on.
I have a couple ideas of how I want the design to work in this pattern. I want there to be rows with long cables running the length. I want there to be rows with two-cables for each long one in the other row. Then I might choose to have four-cables that match those two. I will try to capture the design on paper and include it later.
I will need to configure the pattern repeats to see how they fit with the calculations from #5 above. I also need to go knit a gauge so I can be absolutely sure of the stitches per inch. The yarn requirement for the needle is Size 4. So I will start there.
I finished the calculations for the design pattern on graph paper. It took a bit but I figured a 16-sts repeat that will flow nicely around the skirt, matching at the beginning of each round.
 |
| I played with several cable shapes on the left, but the placement of them on the graph to the right would only allow half of that design. But I am satisfied with that. |
Okay, that is it for tonight.
Wednesday, February 22, 2012
The Second Project is Complete
I finished the second project for the contest last night. It was really late so I didn't journal at that time. I waited until today to capture the process.
As you can see, I decided to knit a hat instead of a scarf. I am glad I did because the pattern really "pops" now. The yarn, Willa, is super bulky and suggests using a size 11 needle. I decided to use that size but chose dpns (double pointed needles) for my needles instead of two circulars. I was not sure how many stitches to cast on my needles, so I did some research. While at Jessica Knits yesterday when I was taking a class teaching finishing techniques, I pulled Ann Budd's book The Knitter's Handy Guide to Patterns off the bookshelf to get the information about how many stitches are needed for various sizes of hats. Because I only have 153 yds. of yarn in the one skein I purchased, I chose the 6-18 months size hat to knit. I also needed to consider my pattern and make sure I cast on enough stitches to allow the repeats and the joining of the design in the round. After graphing my design stitches and calculating my gauge (3 sts per inch), I finally decided to cast on 64 stitches divided between the 4 dpns (16 sts on each one).
The knitting progressed smoothly, especially since I have been using this design so much lately. But I did change the ribbing. Instead of the K1, P1 stitch pattern I used with the Cowl, I decided to use a K2, P2 stitch pattern instead, hoping this would further define the cabling. The bulky yarn and the added stitches in the cable really helped the pattern design "pop". Because the hat was so small, I was concerned at first that maybe I shouldn't use so much bulk. But I was pleased as the work progressed to see that this worked well.
It really didn't take long to knit the hat once I started. There were only four repeats of the pattern to form the brim necessary to get the 5 inches I wanted. I was left with a 2.5 inch brim after turning up the edge. Perfect. Then another four repeats of the pattern was needed to get the crown of the hat long enough to fit the head snuggly. Then I decreased for 1.5 pattern repeats to shape the top of the hat. That was all and then I was finished.
I was especially pleased with the way the cables and ribbing decreased without losing the design definition. There was no shifting of the lines. There was no overlapping of stitches. Using the K2, P2 was perfect, because I could decrease by K2 tog (knit two together), P1 and still have a K-P rib. Then I decreased with a K1, P2 tog (purl two together) still leaving me with a K-P rib.
I spent this afternoon and evening typing the pattern into the computer and saving it as a pdf file so it could be saved as a pattern on Ravelry. At first I thought I would call this pattern simply "Child's Reversible Cable Ribbed Hat"; but because I am using the same design stitches, I went ahead and called this pattern like the first one - "Cable Me One Side - Rib Me The Other Child's Reversible Hat". This will keep all patterns with the similar design stitches in the same category. But I have to laugh. That is one long name for such a short little hat. So the pattern is now posted on Ravelry and is free for downloading. I have the written pattern with the chart configurations finished and ready to be mailed to Juniper Moon Farms. I choose to wait until next week to mail the package because I want to show my knitting groups (The Needlers who meet on Thursdays at Jessica Knits and the Monday night group that meets in Prescott Valley) and Steve's parents and family who we are planning to visit next week. I want them to see the original projects, not just photos of them.
Now that both of these projects for the contest are finished, I am back to the other projects that were placed on hold - the white lace sweater, the wrap I am knitting as a gift, and the Shell that is my own design. I almost forgot what I was knitting when I picked up the Sweater again. Whoa, don't want to allow that to happen. It took a bit of re-figuring to remember where I stopped, but I did and I have already knit one additional row. I want to finish it quickly if I can because I am taking another class starting March 1st where as a group we will be knitting one of Ysolda's sweaters in her book Little Red in the City. Ysolda designed her sweater to be knit from the top down and provides for sleeves that aren't inserted but knit with short rows giving the appearance of insertion. I am real excited about learning those techniques. More about that later once I get there. She also designs patterns that are fitted rather than loose - one size fits all. One chapter in her book gives lengthy and detailed information on how to take those measurements to guarantee a perfect fit. I am glad that as a class we will do that together. Always much easier to measure someone else than myself. This should add to my experience and to the training I received in college when learning all about flat patterns and design.
Well, that't it for tonight. I am going to go sit & knit. So what else is new, huh?
 |
| Cable side out, ribbing on the inside but folded out into a ribbed brim. |
 |
| Ribbed side out with the cabling on the inside but folded up to form the brim. |
The knitting progressed smoothly, especially since I have been using this design so much lately. But I did change the ribbing. Instead of the K1, P1 stitch pattern I used with the Cowl, I decided to use a K2, P2 stitch pattern instead, hoping this would further define the cabling. The bulky yarn and the added stitches in the cable really helped the pattern design "pop". Because the hat was so small, I was concerned at first that maybe I shouldn't use so much bulk. But I was pleased as the work progressed to see that this worked well.
It really didn't take long to knit the hat once I started. There were only four repeats of the pattern to form the brim necessary to get the 5 inches I wanted. I was left with a 2.5 inch brim after turning up the edge. Perfect. Then another four repeats of the pattern was needed to get the crown of the hat long enough to fit the head snuggly. Then I decreased for 1.5 pattern repeats to shape the top of the hat. That was all and then I was finished.
I was especially pleased with the way the cables and ribbing decreased without losing the design definition. There was no shifting of the lines. There was no overlapping of stitches. Using the K2, P2 was perfect, because I could decrease by K2 tog (knit two together), P1 and still have a K-P rib. Then I decreased with a K1, P2 tog (purl two together) still leaving me with a K-P rib.
I spent this afternoon and evening typing the pattern into the computer and saving it as a pdf file so it could be saved as a pattern on Ravelry. At first I thought I would call this pattern simply "Child's Reversible Cable Ribbed Hat"; but because I am using the same design stitches, I went ahead and called this pattern like the first one - "Cable Me One Side - Rib Me The Other Child's Reversible Hat". This will keep all patterns with the similar design stitches in the same category. But I have to laugh. That is one long name for such a short little hat. So the pattern is now posted on Ravelry and is free for downloading. I have the written pattern with the chart configurations finished and ready to be mailed to Juniper Moon Farms. I choose to wait until next week to mail the package because I want to show my knitting groups (The Needlers who meet on Thursdays at Jessica Knits and the Monday night group that meets in Prescott Valley) and Steve's parents and family who we are planning to visit next week. I want them to see the original projects, not just photos of them.
Now that both of these projects for the contest are finished, I am back to the other projects that were placed on hold - the white lace sweater, the wrap I am knitting as a gift, and the Shell that is my own design. I almost forgot what I was knitting when I picked up the Sweater again. Whoa, don't want to allow that to happen. It took a bit of re-figuring to remember where I stopped, but I did and I have already knit one additional row. I want to finish it quickly if I can because I am taking another class starting March 1st where as a group we will be knitting one of Ysolda's sweaters in her book Little Red in the City. Ysolda designed her sweater to be knit from the top down and provides for sleeves that aren't inserted but knit with short rows giving the appearance of insertion. I am real excited about learning those techniques. More about that later once I get there. She also designs patterns that are fitted rather than loose - one size fits all. One chapter in her book gives lengthy and detailed information on how to take those measurements to guarantee a perfect fit. I am glad that as a class we will do that together. Always much easier to measure someone else than myself. This should add to my experience and to the training I received in college when learning all about flat patterns and design.
Well, that't it for tonight. I am going to go sit & knit. So what else is new, huh?
Subscribe to:
Posts (Atom)